The cumulative UV exposure from gel manicures is a documented cause of premature hand ageing, but it is entirely manageable with a proactive skin health protocol.
- Protect skin with broad-spectrum SPF 50+ sunscreen or certified UPF 50+ gloves during every single appointment.
- The most common damage to nails is caused by improper, aggressive removal techniques, not the gel polish itself.
Recommendation: Treat your hands like your face by pausing active ingredients like retinol 3-5 days before your manicure and focusing on barrier repair afterwards.
There’s a unique satisfaction that comes with a fresh gel manicure: flawless, durable, and glossy colour that lasts for weeks. Yet, for many regular salon-goers, a nagging concern clouds this small pleasure. As you place your hands under the curing lamp, you might wonder about the long-term effects. Are these regular bursts of UV light accelerating the ageing of your hands, causing sun spots and fine lines? You’ve likely heard conflicting advice—that LED lamps are completely safe, or that the risk is negligible. This creates a confusing landscape for anyone trying to care for their skin.
As a dermatologist, my perspective is clear: the concern is valid. The key to mitigating the risk isn’t about giving up gel manicures, but about shifting your mindset. It’s time to move beyond simple tips and adopt a comprehensive, dermatological-grade hand care protocol. This approach treats the skin on your hands with the same diligence you apply to your face. It’s not about a single action, but a routine that manages cumulative exposure, prepares the skin *before* the appointment, protects it *during*, and helps it recover *after*.
This guide will provide that protocol. We will dismantle common myths, explain the science in simple terms, and give you a precise, actionable plan. By understanding the real risks and implementing these preventative strategies, you can continue to enjoy your beloved manicures while confidently preserving the long-term health and youthfulness of your hands.
To navigate this complete guide, the summary below outlines the key stages of our preventative protocol, from understanding the light source to long-term nail recovery.
Summary: A Dermatologist’s Protocol for Safe Gel Manicures
- Why Do LED Lamps Also Emit Ageing UVA?
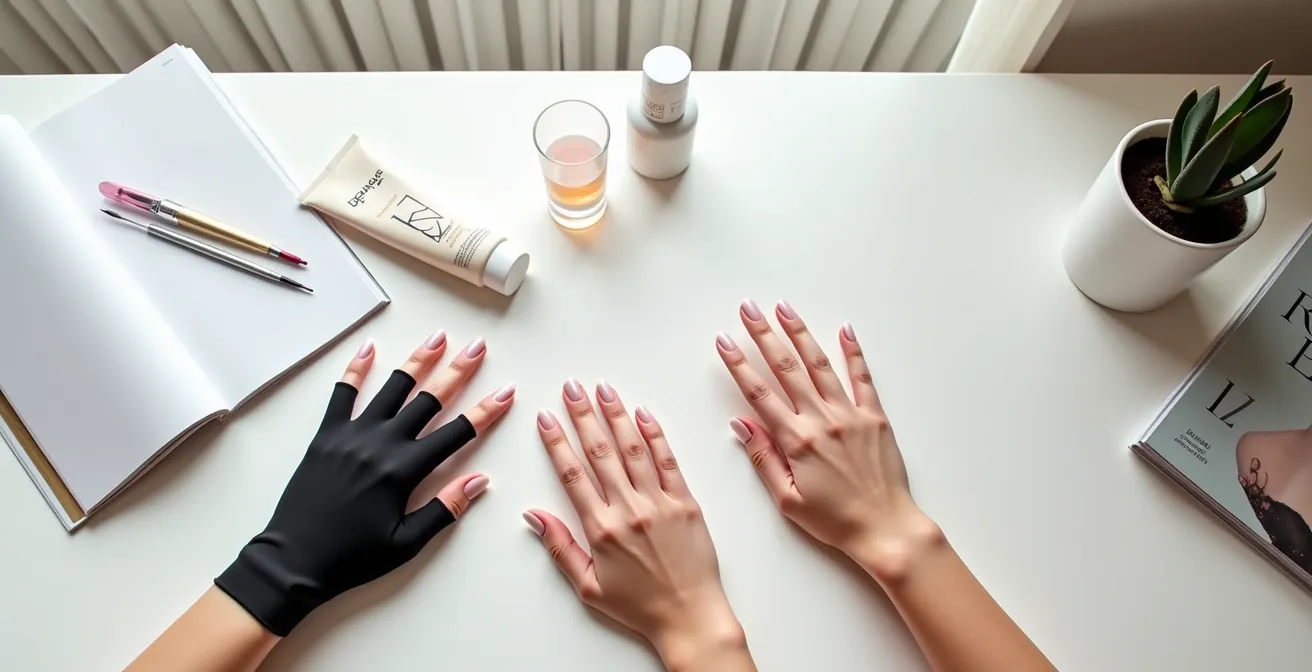
- How to Use Anti-UV Gloves or Sunscreen Before Your Appointment?
- Semi-Permanent or Classic Polish: What’s the Impact on Nail Dryness?
- The Mistake of Letting Cuticles Be Cut Too Short at the Salon
- When to Let Your Nails ‘Breathe’ Between Two Gel Applications?
- The Fatal Mistake of Using Retinol at Night Without Sunscreen in the Morning
- How Long to Stop Active Ingredients to Restore Healthy Skin: The Cosmetic Fasting Cure
- Healing the Nail Bed: How to Recover After Years of Acrylics?
Why Do LED Lamps Also Emit Ageing UVA?
One of the most persistent myths in the nail industry is the idea that LED lamps are inherently “safer” than older UV lamps. This is a dangerous misunderstanding. Both types of lamps function by emitting ultraviolet (UV) radiation to cure the gel polish. The primary difference is efficiency, not safety. LED lamps cure polish faster because they emit energy in a narrower, more targeted wavelength of the UVA spectrum. However, they are still emitting UVA rays, the same type of radiation responsible for photoageing—wrinkles, sun spots, and loss of skin elasticity.
While UVB rays are the main cause of sunburn, UVA rays penetrate deeper into the skin, damaging the collagen and elastin fibres that keep it firm and youthful. The exposure from a single manicure is small, but the danger lies in the cumulative effect. Bi-weekly appointments add up to dozens of concentrated UV exposures over a year. A landmark 2023 study published in Nature Communications highlighted this risk, finding that cell death and DNA damage occurred in human cells after repeated 20-minute sessions under a standard UV nail dryer.
Marketing can be misleading. As Candice Quinn, founder of the UV protective brand Manisafe London, explains, “Whether it’s called a UV lamp or an LED lamp—it emits UV rays. Just because it is an LED lamp does not make it safe.” Understanding this fundamental point is the first step in taking control of your hand health. The goal is not to fear the lamp, but to respect its power and shield your skin accordingly every single time.
How to Use Anti-UV Gloves or Sunscreen Before Your Appointment?
Once you accept that all gel curing lamps emit UVA radiation, proactive protection becomes non-negotiable. The two most effective methods are applying a broad-spectrum sunscreen or wearing UPF (Ultraviolet Protection Factor) fingerless gloves. Both are excellent choices, but they fit different lifestyles and preparation habits. Your decision should be based on convenience, cost, and ensuring you have a method you will stick to for every appointment.
This image perfectly captures the two best-practice methods for protection in a UK salon setting.
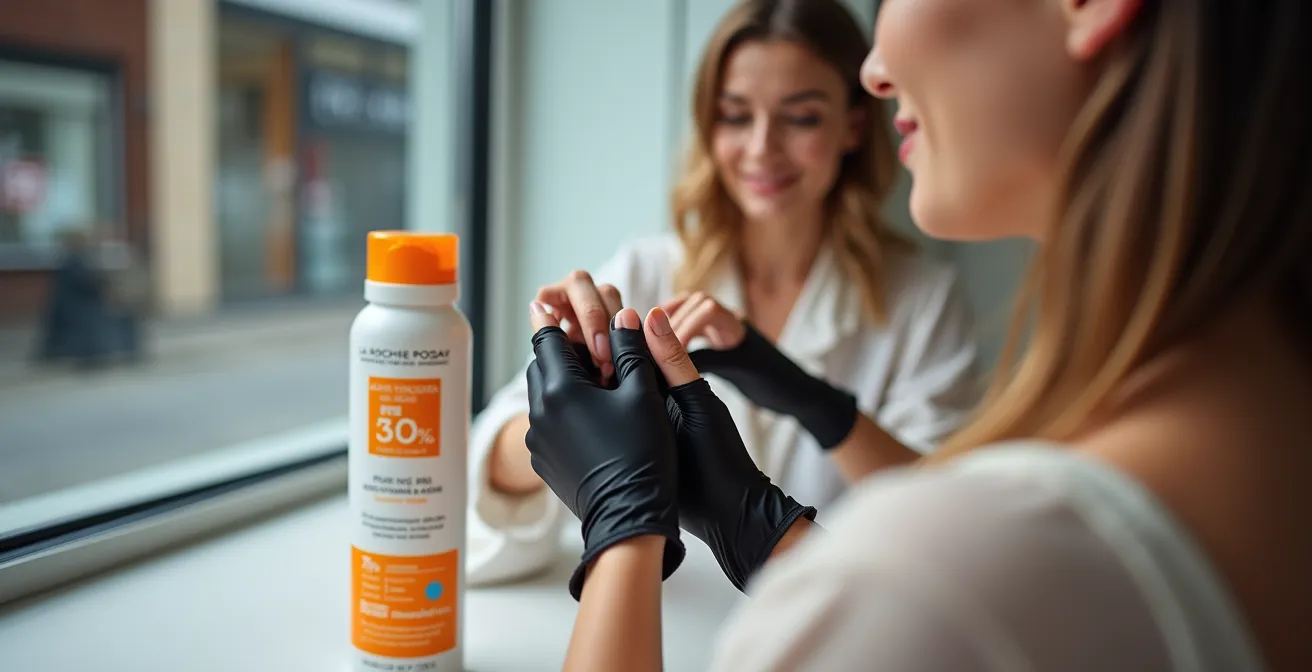
As you can see, the options are simple and discreet. The first is a pair of UPF 50+ fingerless gloves, which physically block over 98% of UV rays. They are reusable, cost-effective in the long run (around £10-15 per pair), and take only seconds to put on at the salon. The second option is a broad-spectrum SPF 50+ sunscreen. For this to be effective, it must be applied generously to the backs of your hands and fingers at least 20 minutes before your appointment to allow it to absorb and form a protective film. This is a critical step many people miss. A mineral-based sunscreen containing zinc oxide or titanium dioxide is often recommended for immediate, robust protection.
You may feel awkward about bringing your own protective gear, but any professional salon should respect your commitment to skin health. A simple, polite request like, “I’m being extra careful with my skin health lately, would you mind if I pop on some sunscreen before we start?” is always well-received. Ultimately, gloves offer more reliable, “set-it-and-forget-it” protection, as it’s easy to under-apply sunscreen or forget to apply it in advance.
Semi-Permanent or Classic Polish: What’s the Impact on Nail Dryness?
While UV exposure is the primary concern for skin health, the choice of polish has a direct impact on the health and integrity of the nail plate itself. Gel polish offers unparalleled longevity, but this benefit comes at the cost of a more aggressive application and removal process, which is the main culprit behind nail dryness, brittleness, and thinning. A study from the Miami School of Medicine confirmed that gel manicures can cause measurable nail thinning, attributing most of the damage to improper removal rather than the gel itself.
The main issue is the removal process, which typically involves soaking nails in 100% acetone for 10-15 minutes. Acetone is extremely effective at dissolving the polish but also strips the nail plate and surrounding skin of its natural oils, leading to severe dehydration. This is often compounded by mechanical damage from technicians aggressively scraping or filing the softened gel off the nail. In contrast, classic polish can be removed with gentle, often acetone-free removers that have a minimal dehydrating effect.
This comparative table breaks down the key differences, including the popular UK option of BIAB (Builder in a Bottle), which offers a middle ground by requiring UV curing but often allowing for gentler “infills” rather than a full soak-off removal each time.
| Polish Type | Nail Plate Dehydration | Mechanical Damage Risk | UV Skin Exposure | Longevity | Removal Process Impact |
|---|---|---|---|---|---|
| Gel Polish | High (acetone soak) | Medium | High (10-15 min) | 2-3 weeks | 10-15 min acetone soak strips natural oils |
| BIAB (Builder in a Bottle) | Low-Medium | Low (infills only) | High (UV required) | 3-4 weeks | Less harsh – infills rather than full removal |
| Classic Polish | Minimal | Very Low | None | 3-7 days | Gentle non-acetone removers |
Choosing the right polish is about balancing your lifestyle needs with your nail health. If you love the durability of gel, focus on finding a technician who uses gentle removal techniques and be diligent with rehydration post-manicure. Alternating between gel and classic polish can also provide a much-needed break from the harsh acetone cycle.
The Mistake of Letting Cuticles Be Cut Too Short at the Salon
The quest for a “clean” and perfectly manicured look often leads to a common salon practice that compromises the health of your nails: cutting the cuticles. From a dermatological standpoint, this is a significant mistake. The cuticle is not dead skin to be removed; it is the nail’s natural protective seal. Its crucial function is to form a barrier that prevents moisture and microorganisms from entering the nail matrix, the area where nail cells are created.
When this seal is cut or aggressively pushed back, it creates tiny breaks in the skin, leaving your nail matrix vulnerable to irritation and infection (paronychia). A compromised cuticle can lead to inflammation, redness, and swelling, and can even affect the healthy growth of the nail, causing ridges or white spots. Furthermore, this inflamed and broken skin is more susceptible to the damaging effects of UV radiation during the curing process. In the UK, professional standards reflect this understanding. Technicians trained according to British Association of Beauty Therapy & Cosmetology (BABTAC) standards are taught to gently push back the cuticle and only trim the non-living hangnails at the sides, never to cut the living tissue of the eponychium (the cuticle itself).
You have the right to direct your service. Politely insist that your technician only pushes back the cuticle gently and does not use cutters on the seal itself. Your focus should be on hydrating this area with cuticle oil daily to keep it healthy, flexible, and intact. A healthy cuticle is the gatekeeper of a healthy nail.
Your 5-Point Cuticle Integrity Audit
- Points of Contact: Verbally confirm with your nail technician a “no cutting, push back only” policy before the service begins.
- Protective Barrier: Before any acetone soak-off, apply a thick layer of petroleum jelly or a barrier cream to the cuticles and surrounding skin to shield them.
- Post-Removal Care: After the manicure, re-apply cuticle oil and hand cream immediately to replenish lost moisture.
- Daily Maintenance: Massage a high-quality cuticle oil (containing jojoba or vitamin E) into your cuticles every night to maintain their flexibility and waterproof seal.
- Monitor for Distress: Regularly check your cuticles for any signs of redness, swelling, or peeling, which indicate a compromised barrier that needs a break from salon treatments.
When to Let Your Nails ‘Breathe’ Between Two Gel Applications?
The phrase “letting your nails breathe” is one of the most common pieces of advice given, but it’s based on a biological inaccuracy. Nails are composed of keratin, a non-living protein, and they receive their oxygen and nutrients from the bloodstream via the nail bed, not from the air. Therefore, they do not need to “breathe”. This clarification is crucial for understanding the real purpose of taking a break from gel manicures.
Contrary to popular belief, your nails do not need to ‘breathe’ as they are not living tissue like skin. Nails are made of keratin, and they don’t require breaks between applications to stay healthy.
– Semilac UK Nail Experts, Semilac UK Educational Blog
So, if nails don’t breathe, why are breaks important? The break is not for the nail, but for the nail plate and surrounding skin to recover from the stress of the removal process. The cycle of acetone soaks and potential scraping thins and dehydrates the nail plate, making it brittle and prone to peeling. A “nail holiday” allows time for this damage to be repaired and for the nail to regain its natural strength and flexibility.
The macro photograph below showcases the texture and healthy surface of a nail that has undergone a proper recovery period.
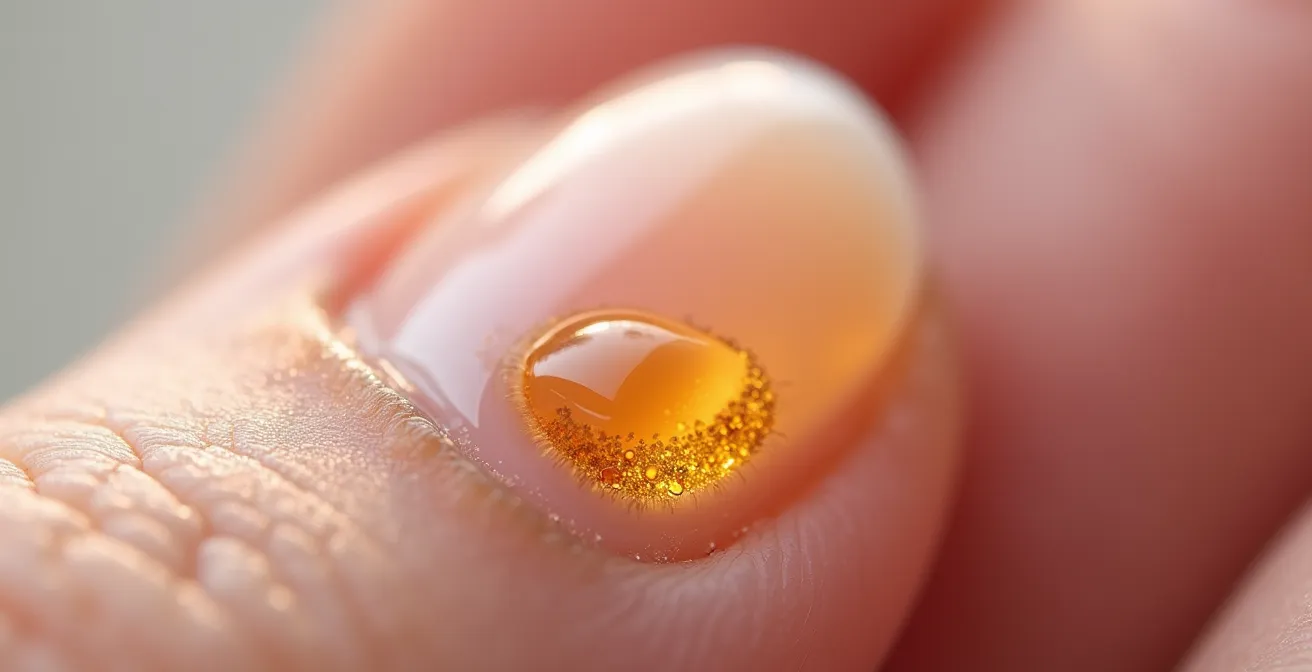
You should plan a recovery break of at least two weeks if you notice any signs of distress: peeling, splitting, increased flexibility (bending easily), white spots (leukonychia), or tenderness of the nail bed. During this time, keep nails short to prevent snagging and focus on intensive rehydration. A dedicated 14-day protocol can work wonders, focusing first on structural repair with a keratin-based treatment, followed by deep hydration with nourishing oils and barrier creams.
The Fatal Mistake of Using Retinol at Night Without Sunscreen in the Morning
Your diligent facial skincare routine could be inadvertently sabotaging the health of your hands. Many of us apply anti-ageing serums to our face and neck at night and, as an afterthought, rub the excess onto the backs of our hands. If that serum contains a retinoid (like retinol or tretinoin) or exfoliating acids (like glycolic acid), you are making your hands significantly more sensitive to UV light. This is known as drug-induced photosensitivity.
Retinoids and AHAs work by accelerating skin cell turnover, which reveals fresher, new skin. However, this new skin is thinner and has less natural protection against UV radiation. Using these ingredients without applying broad-spectrum sunscreen religiously every morning is a critical error. Placing photosensitised hands under a concentrated UVA lamp during a manicure can amplify the damage, increasing the risk of sunburn, blistering, and long-term photoageing. This risk isn’t limited to skincare; dermatologists warn about medication-induced photosensitivity from certain oral antibiotics, like doxycycline, which can also cause severe reactions when exposed to UV light.
The solution is a “pre-habilitation” protocol. You must create a buffer zone around your manicure appointment. This involves pausing all “active” ingredients on your hands for several days beforehand. A simple rule is to stop applying any retinoids, AHAs, or BHAs to your hands 3 to 5 days before your scheduled appointment. During this period, switch to a simple, nourishing hand cream that focuses on hydration and barrier support. On the day of your manicure, applying a mineral-based SPF 30+ is your final, non-negotiable step.
How Long to Stop Active Ingredients to Restore Healthy Skin: The Cosmetic Fasting Cure
The concept of “cosmetic fasting” is about strategically pausing active ingredients to allow your skin’s natural barrier to repair itself. For the hands of a gel manicure enthusiast, this isn’t a trend; it’s an essential part of a long-term health protocol. The skin on our hands is constantly under assault—from UV lamps, acetone soaks, and the very anti-ageing ingredients we use to help it. A structured fast before and after your appointment gives your skin the breathing room it needs to rebuild its resilience.
This isn’t about stopping all products, but about being highly selective. The goal is to eliminate any potential irritants or photosensitisers and switch to a routine focused purely on hydration and barrier support. Products containing ceramides, hyaluronic acid, glycerin, and soothing ingredients like niacinamide or panthenol are your allies during this phase. A thick, occlusive balm like La Roche-Posay’s Cicaplast Baume B5 can be particularly effective in the 24 hours following a manicure to calm inflammation and lock in moisture.
A structured timeline is the most effective way to implement this. The table below outlines a simple yet powerful pre- and post-manicure protocol for your hands, ensuring they are prepared for the stress of the appointment and cared for optimally afterwards.
| Timeframe | Action Required | Products to Use | Products to Avoid |
|---|---|---|---|
| 72 hours before | Cease all exfoliating acids | Simple hydrating creams | Retinoids, AHAs, BHAs |
| Day of manicure | Apply broad-spectrum SPF | Mineral sunscreen SPF 30+ | All active ingredients |
| 24 hours after | Focus on barrier repair | La Roche-Posay Cicaplast Baume | All actives and exfoliants |
| 48-72 hours after | Continue gentle care | Barrier creams, cuticle oils | Retinoids, acids |
| 1 week after | Resume normal routine | Regular anti-aging products | None |
Adopting this simple rhythm transforms your manicure from an isolated event into an integrated part of your wider skincare philosophy. It’s a proactive strategy that pays significant dividends in preventing long-term damage and maintaining soft, healthy, and youthful-looking hands.
Key Takeaways
- All gel curing lamps, including LED, emit ageing UVA rays. Protection is not optional.
- The greatest risk of nail damage comes from improper, aggressive removal of gel polish, not the product itself.
- Your daily skincare routine (e.g., retinol) can make your hands more sensitive to UV light, requiring you to pause actives before a manicure.
Healing the Nail Bed: How to Recover After Years of Acrylics?
Years of acrylic or gel manicures without proper care or recovery breaks can leave nails in a severely weakened state. You might experience thinning, peeling, splitting, and a general lack of resilience. Healing the nail bed and restoring the nail plate to its former glory is a marathon, not a sprint. It requires patience and a dedicated “rescue” routine. It’s important to have realistic expectations: according to board-certified dermatologists, it takes approximately six months to completely grow out a fingernail, so consistency is key.
Your first step is to commit to a total break from any kind of polish or artificial enhancement. Keep your nails filed short to minimise the risk of bending and further breakage. The focus of your recovery should be twofold: structural repair and intensive hydration. For repair, use a keratin-based treatment like OPI Nail Envy or CND RescueRXX, applying it daily as directed. These products help to bond the keratin layers of the nail, creating strength from within.
For hydration, a multi-pronged approach is best. Massage a high-quality nail and cuticle oil, such as L’Occitane Shea Nail & Cuticle Oil or CND Solar Oil, into the nails and surrounding skin multiple times a day. This replenishes the oils stripped by acetone and improves flexibility. Pair this with a rich, barrier-protecting hand cream applied throughout the day. Some people also find that taking a Biotin supplement can support healthy nail growth, but you should always consult your GP before starting any new supplement. For severe cases, a professional opinion is essential.
For severe damage like lifting or persistent discoloration, seek help from a podiatrist or dermatologist registered with the Royal College of Podiatry or British Association of Dermatologists.
– UK Nail Health Advisory
Start treating your hands with the same preventative care and respect you give your face. By adopting this complete dermatological protocol, you are investing in their long-term health and youthfulness. Your future self will thank you.