
In summary:
- The extreme weakness, redness, and sensitivity you feel are likely due to mechanical over-filing that has thinned your natural nail plate, not a chemical reaction.
- True recovery is an active process combining gentle care, targeted products like penetrating hardeners, and creating a protective shield against daily micro-trauma.
- Focus on nourishing the nail matrix (the growth source) with specific oils like jojoba and sweet almond to build stronger nails from the base up.
- Patience is key; it takes approximately 3 to 6 months to grow out a completely new, healthy nail, but you will see improvements in strength and comfort within weeks.
The acrylics are off, but instead of relief, there’s a shock. Your natural nails are unrecognisable. They’re thin, bendy, red, and so sensitive that even washing your hands is uncomfortable. This distressing state is a shared experience for many who’ve said goodbye to extensions, and the immediate search for a solution often leads to a barrage of conflicting advice. You’ve probably heard the standard tips: “just let them breathe,” “keep them short,” or “take some biotin.” While well-intentioned, these suggestions often miss the fundamental issue.
The problem isn’t just cosmetic; it’s structural. Years of acrylic application and, more importantly, the aggressive electric filing involved in preparation and removal, have likely compromised your nail’s natural architecture. You’re not just dealing with a weak nail; you’re dealing with a traumatised nail bed and a thinned, vulnerable nail plate. But what if the key isn’t passive waiting, but an active, gentle reconstruction? What if the solution lies in understanding the ‘why’ behind the damage to apply the ‘how’ of healing with precision and empathy?
This guide moves beyond the platitudes. We will treat your nail recovery not as a waiting game, but as a healing protocol. We will focus on rebuilding your nail’s integrity from the matrix up, protecting it from environmental aggressors, and nourishing it back to resilient health. We will delve into the science of why the damage occurs, how to choose the right healing products available in the UK, and the crucial daily habits that create a protective sanctuary for new, strong growth to emerge. This is your roadmap to reclaiming the health and comfort of your natural nails.
This article provides a comprehensive, step-by-step plan for recovery. From understanding the initial trauma to adopting a long-term philosophy for nail health, each section builds upon the last to guide you through the healing journey.
Summary: Healing Your Nails From the Inside Out
- Why Has the Electric File Thinned Your Nail Plate?
- How to Use Formaldehyde-Free Penetrating Hardeners?
- Sweet Almond or Jojoba Oil: Which One Nourishes the Nail Matrix?
- The Mistake of Washing Dishes Without Gloves with Weakened Nails
- Breakage Problem: Why Keeping Nails Short Is Essential During Healing?
- How Do Topical Probiotics Help Calm Inflammation?
- When to Take Off Your Rings: Gardening, Gym, and Sleep Are Mandatory
- The 3-Step ‘Skinimalism’ Routine That Saves £200 a Year?
Why Has the Electric File Thinned Your Nail Plate?
The most confronting part of post-acrylic recovery is the physical state of your nails: soft, paper-thin, and often accompanied by a painful, reddish hue. It’s crucial to understand that this is rarely a ‘chemical’ damage from the acrylic itself. The primary culprit is mechanical trauma. Aggressive use of an electric file (e-file) during application prep and removal physically grinds away layers of your natural nail plate. This over-filing is so common that research indicates nearly 70% of individuals who regularly use acrylic nails report experiencing some form of nail damage. The redness you see is a sign of inflammation and thinned nail that reveals the pink, blood-rich nail bed beneath—it’s essentially a warning signal.
A responsible nail technician is trained to prevent this. They know how to control the e-file’s speed and pressure, and they are vigilant for warning signs like “rings of fire”—painful red arcs that appear on the nail during filing. This is an immediate red flag indicating the tech is filing too deeply. If you’ve experienced this, your nail plate has been compromised. In the UK, looking for technicians with VTCT or NVQ certifications provides a layer of assurance, as these qualifications include comprehensive training on safe e-file usage and natural nail health. A professional should be able to explain their process and immediately stop if you feel any excessive heat or pain.
Your 5-Step Nail Recovery Kick-start Plan
- Assess & Document: Take clear, well-lit photos of your bare nails from multiple angles. This objective baseline will help you track progress and stay motivated.
- Gentle Reshaping: Immediately file all nails down to a short, manageable length using a glass or crystal file. Focus on creating a smooth, rounded edge with no snags to prevent further tearing.
- Build Your Healing Toolkit: Purchase the three essentials: a quality formaldehyde-free penetrating hardener, a nourishing cuticle oil (like jojoba or almond), and several pairs of protective household gloves.
- Establish the Hydration Ritual: Commit to the new routine. Set twice-daily reminders on your phone to massage cuticle oil into your nails and the surrounding skin for at least one minute.
- Create ‘No-Go’ Zones: Make a clear commitment to protect your nails. Place gloves right by the sink for washing up and under the sink for cleaning tasks. Make protection an automatic reflex, not an afterthought.
Understanding the cause is the first step in reversing the damage. You are not starting from scratch; you are healing a wound. This requires a gentle, targeted approach, not more harsh treatments.
How to Use Formaldehyde-Free Penetrating Hardeners?
With nails this fragile, the instinct is to coat them in the strongest “hardener” you can find. However, this can be a critical mistake. Many traditional hardeners work by creating a rigid, film-like layer on the surface. While this feels protective initially, it doesn’t address the underlying weakness. Worse, formulas containing formaldehyde can make nails so inflexible they become brittle and snap at the slightest pressure—a phenomenon known as paradoxical brittleness. The modern, empathetic approach is to use a penetrating hardener. These products contain ingredients like hydrolysed proteins and panthenol that work *within* the nail’s keratin structure, helping to cross-link and reinforce it from the inside out, promoting flexibility alongside strength.
When selecting a product, always check the ingredients list to ensure it is formaldehyde-free. Many excellent options are readily available on the UK high street, catering to different levels of damage.
The table below offers a comparison of popular, effective choices you can find in stores like Boots or Superdrug.
| Product | Key Ingredients | Price Range | Best For |
|---|---|---|---|
| Essie Hard to Resist | Hydrolyzed wheat protein | £8-10 | Mild damage |
| OPI Nail Envy Sensitive & Peeling | Calcium, panthenol | £14-18 | Severe peeling |
| Sally Hansen Repair + Rescue | Keratin protein | £7-9 | Budget option |
Correct application is just as important as the product choice. To avoid making the nails too rigid, it’s best not to apply it daily. A beneficial cycle is to apply one or two thin coats, leave it on for three days, remove it gently with an acetone-free remover, and then give your nails a four-day break with only cuticle oil. This routine provides protection while allowing the nail to maintain its natural, necessary flexibility. Using nail strengtheners in moderation, perhaps 2-3 times weekly, is ideal for promoting resilient growth.
Sweet Almond or Jojoba Oil: Which One Nourishes the Nail Matrix?
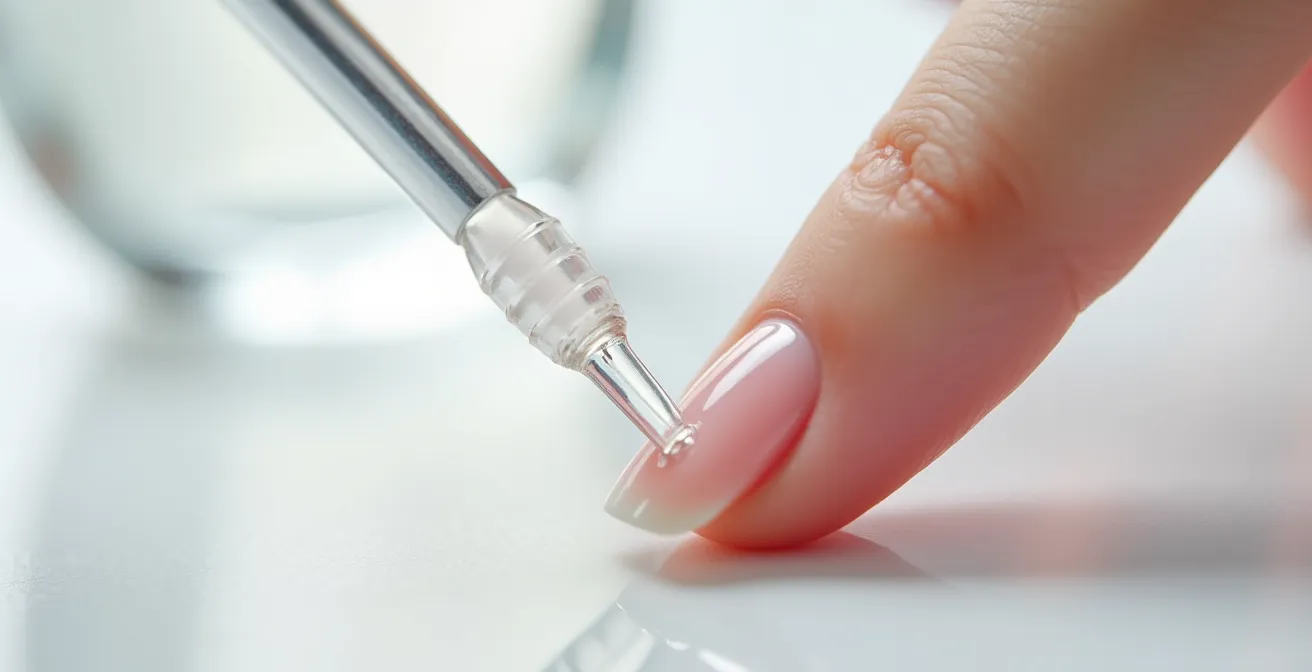
While hardeners provide a protective shield, true, lasting nail health is cultivated at the source: the nail matrix. This is the living part of the nail unit, located under the skin just behind your cuticle, where new nail cells are created. Nourishing this area is non-negotiable for growing out damage and building a stronger nail plate. This is where dedicated cuticle oils become your most powerful tool. But not all oils are created equal. The two standouts for nail recovery are jojoba and sweet almond oil, each offering a distinct benefit.
Jojoba oil is the star for penetration. Its molecular structure is incredibly similar to the natural sebum produced by our skin, allowing it to be absorbed deeply into the nail plate and surrounding tissue. It acts as a carrier, helping to deliver moisture past the surface layers. Sweet almond oil, on the other hand, is prized for its rich nutritional content, specifically Vitamin E and essential fatty acids. It is a superb emollient, conditioning the cuticle and providing the building blocks that support healthy cell production in the matrix. For best results, use a blend of both. You can easily make your own by mixing 15ml of jojoba oil with 5ml of sweet almond oil and adding a few drops of lavender essential oil for its anti-inflammatory properties.
Consistency is everything. Massage this oil into your eponychium (the living skin at the base of the nail) and nail folds for several minutes, twice a day. This ritual not only hydrates but also stimulates blood flow to the matrix, further encouraging healthy growth. Remember to be patient; on average, fingernails grow about 3 millimeters each month, meaning it takes a full 3 to 6 months to see a completely new, undamaged nail emerge. Your daily oil habit is a direct investment in that future healthy nail.
The Mistake of Washing Dishes Without Gloves with Weakened Nails
You can apply the most expensive oils and hardeners, but if you plunge your weakened nails into a sink of hot, soapy water, you are undoing all your hard work. Water is the enemy of a damaged nail. The nail plate is porous, and excessive water exposure causes it to swell. As it dries, it contracts. This constant cycle of expansion and contraction puts immense strain on the delicate keratin layers, leading to peeling, splitting, and further weakening. This effect is magnified by household detergents. Products common in UK households, like Fairy Liquid, contain powerful surfactants designed to strip grease from dishes, and they will just as effectively strip the natural oils from your nails and skin.
The danger escalates with stronger cleaning agents. Harsh chemicals found in products like Cillit Bang can cause severe dehydration and can even be corrosive to a compromised nail plate. The solution is simple but non-negotiable: wear gloves. This single habit is the most effective form of protection you can provide. It creates a physical barrier not just against water and chemicals, but also against the minor bumps and scrapes of household chores that can be catastrophic for fragile nails.
Choosing the right glove for the task ensures both comfort and protection. You don’t need the same heavy-duty glove for washing a few mugs as you do for deep-cleaning the bathroom.
| Task | Glove Type | UK Brand Example | Protection Level |
|---|---|---|---|
| Washing dishes | Standard rubber | Marigolds | Basic moisture barrier |
| Heavy cleaning | Thick flock-lined | Vileda Heavy Duty | Chemical resistance |
| Gardening | Durable fitted | Town & Country | Physical + moisture protection |
Think of gloves as a core part of your nail care routine—a “top coat” for your hands. Keep a pair by every sink in the house to make it an effortless, automatic reflex. This simple change will dramatically accelerate your nails’ recovery by giving them a stable, protected environment in which to heal.
Breakage Problem: Why Keeping Nails Short Is Essential During Healing?
When your nails are thin and flexible, any length is a liability. A longer nail acts as a lever, and the slightest bump or snag can cause it to bend, tear, or break, often painfully deep into the nail bed. Keeping your nails short during the recovery phase is not a matter of aesthetics; it is a structural necessity. It minimises the mechanical stress on the weakened nail plate and drastically reduces the opportunities for further damage, allowing the new, healthier nail to grow out from the matrix without interruption.
How you shorten them is critical. Throw away your nail clippers. On a damaged nail, the sharp, crushing action of clippers can compress and delaminate the already fragile keratin layers, causing more peeling and splitting. The only tool you should be using is a gentle file. As one expert advises:
Use a glass nail file, they’re gentler than metal or emery boards and help prevent snags.
– Botanist Nails Expert, How to Recover from Nail Damage After Acrylics
A crystal or glass nail file has a finer, more uniform grit that seals the nail edge as it files, preventing snags. The correct technique is also vital: always file gently in one direction, from the outer edge towards the centre. Avoid a back-and-forth sawing motion, which frays the nail tip. It’s better to file a small amount every few days than to try and remove a lot of length at once. This ‘little and often’ approach maintains a smooth, snag-free edge and keeps the nail at a safe, functional length.
Embracing a short, clean, well-manicured nail is a powerful mindset shift. It reframes the recovery period as a chic, minimalist phase, rather than a frustrating waiting game. It is a sign of intentional care and the foundation upon which your future healthy nails will be built.
How Do Topical Probiotics Help Calm Inflammation?
The redness and sensitivity you’re experiencing are clear signs of inflammation in the nail bed and surrounding tissues. While protecting the nail and nourishing the matrix are key, directly addressing this inflammation can significantly speed up the healing process and improve comfort. An innovative and effective approach is the use of topical probiotics. Just like our gut, our skin has its own delicate microbiome—a community of beneficial bacteria that helps protect it and regulate its immune response. The trauma of over-filing and chemical exposure can disrupt this balance, allowing inflammatory responses to take over.
Topical probiotics work by helping to rebalance the skin’s microflora. They can help to soothe irritation, reduce redness, and strengthen the skin’s natural barrier function. While specific “nail probiotics” are rare, you can cleverly repurpose high-quality probiotic facial serums for this task. UK-available skincare brands like Gallinée and Aurelia London are renowned for their microbiome-focused formulas. Applying just one drop of a probiotic serum to the nail folds and cuticle area daily, and massaging it in gently, can help to calm the inflamed tissue and create a healthier environment for nail growth.
This healing-from-the-outside-in approach can be powerfully supported by nurturing your internal microbiome as well. Incorporating a variety of probiotic-rich foods into your diet provides the building blocks for overall health, which is reflected in your skin and nails. Consider adding these to your weekly shop:
- Natural live yoghurts like Yeo Valley or Rachel’s Organic.
- Kefir, a fermented milk drink available at most large UK supermarkets like Tesco and Sainsbury’s.
- Sauerkraut, often found in the Polish or world food aisles.
- Kombucha, a fermented tea available from health food stores like Holland & Barrett.
By combining topical application with internal support, you tackle inflammation on two fronts, creating an optimal, calm environment for your nails to regenerate.
When to Take Off Your Rings: Gardening, Gym, and Sleep Are Mandatory
While focusing on oils and gloves, it’s easy to overlook a constant source of potential micro-trauma and irritation: your rings. While beautiful, rings can sabotage your nail recovery efforts, especially when your nail beds are compromised. The primary issue is moisture-trapping. As your damaged nails grow out, a small gap can form between the nail plate and the nail bed. This area, combined with the space under a ring, creates a perfect, dark, moist environment—ideal conditions for fungal and bacterial infections to take hold. Rings essentially compound this risk by creating an additional moisture trap right against the vulnerable tissue of your finger.
Beyond moisture, rings pose a physical risk. During activities like working out at the gym, gardening, or even sleeping, a ring can catch on something, putting sudden, intense pressure on the nail and finger. For a healthy nail, this might be a minor inconvenience. For a thin, weak nail, it can lead to a significant break or tear. Furthermore, the constant small movements and pressure of a ring can cause friction and irritation to the already sensitive skin around the nail.
To give your nails the best possible chance to heal, it’s wise to adopt a strict ‘ring-free’ policy for certain activities. Make it a habit to remove your rings in these mandatory situations:
- Before sleeping: This allows your skin to breathe and dry out completely overnight.
- During any form of exercise: This prevents both physical damage from catching the ring and the buildup of sweat underneath it.
- When gardening or doing any manual work: Protects against physical damage and trapping dirt and bacteria.
- Before showering, bathing, or swimming: Minimises the duration of moisture exposure under the ring.
Removing your rings isn’t just about protecting the jewellery; it’s a critical part of creating a clean, dry, and low-irritation environment that is essential for the uninterrupted healing of your nails and surrounding skin.
Key Takeaways
- The primary cause of post-acrylic nail damage is almost always mechanical (over-filing), not chemical, requiring a gentle, structural repair approach.
- An effective recovery is an active, three-part process: PROTECT with gloves, HYDRATE the matrix with penetrating oils, and FORTIFY with the correct type of hardener.
- Consistency over intensity is the golden rule. Small, daily positive habits (like oiling) are far more effective than infrequent, harsh treatments.
Beyond Repair: The ‘Nail Skinimalism’ Philosophy for Long-Term Health
The journey of healing your nails after acrylics offers more than just a return to baseline; it’s an opportunity to completely redefine your relationship with nail care. This period forces a shift away from a cycle of damage and concealment towards a philosophy of ‘nail skinimalism’. This approach prioritises the inherent health and beauty of the natural nail, focusing on a minimal set of effective, nurturing products rather than complex, expensive, and often damaging cosmetic procedures. It’s about celebrating a clean, healthy, and strong natural nail as the ultimate goal.
This minimalist philosophy is not only better for your nail health but is also remarkably beneficial for your finances. The relentless cycle of acrylic fills and salon visits represents a significant annual expense. By redirecting a fraction of that cost into a simple, high-quality home care routine, the savings are substantial.
| Option | Frequency | Cost per Session | Annual Total |
|---|---|---|---|
| Acrylic fills | Every 3 weeks | £35 | £606 |
| Skinimalism routine | One-time purchase | £25 initial | £50 (with replacements) |
| Annual Savings | – | – | £556 |
Adopting this routine is simple and affordable. The core ‘skinimalist’ toolkit consists of just three essential items, with a total initial investment of under £25. It’s a testament to the fact that effective care doesn’t have to be expensive.
- Step 1 – PROTECT: A £2 pair of Marigold gloves from any UK supermarket.
- Step 2 – HYDRATE: An £8 bottle of quality cuticle oil from Boots, which will last for 3-4 months.
- Step 3 – FORTIFY: A £14 bottle of penetrating hardener, used sparingly twice a week.
Consider creating a ‘Nail Sinking Fund’: each month you would have spent £35 on an acrylic fill, transfer that money into a separate savings account. At the end of the year, you’ll have not only beautifully healthy nails but also a significant sum saved for a treat, a holiday, or simply financial peace of mind. This transforms a period of recovery into a powerful act of self-care and financial empowerment.
By embracing this ‘less is more’ approach, you are not just healing your nails for now; you are investing in their sustainable, long-term health and strength for the future. Start today by assembling your minimalist toolkit and begin the rewarding journey back to naturally beautiful nails.